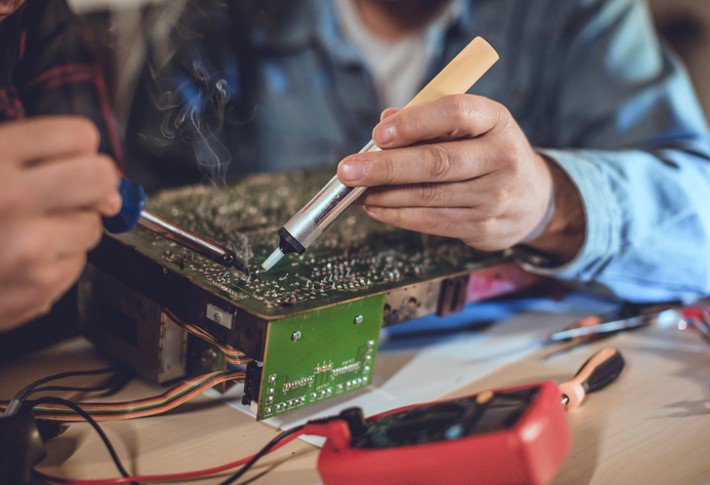
When you’re learning about electronics or working with a soldering iron, you might come across a tool called a “solder sucker.” This tool is essential for fixing mistakes, cleaning up excess solder, and making sure everything works properly. But what exactly is a solder sucker, and why is it important? In this article, we’ll take a deep dive into the world of best solder sucker, explaining what they are, how they work, and why they’re a must-have tool for anyone working with electronics.
What is a Solder Sucker?
A solder sucker is a tool used to remove molten solder from a circuit board or other electronic parts. Solder is a metal that is melted and used to join components together in electronics. However, sometimes you need to remove solder if you want to fix a mistake, replace a component, or simply clean up a board. That’s where the solder sucker comes in.
When you apply heat to a joint, the solder melts. The solder sucker helps by creating a vacuum that “sucks” up the melted solder. Think of it like a vacuum cleaner but for solder. It’s a helpful tool to have when you’re working on any project that involves soldering.
Why Do We Need a Solder Sucker?
The primary reason to use a solder sucker is to remove solder from places where it shouldn’t be. Imagine you’re soldering a tiny wire onto a circuit board, but you accidentally get some solder in the wrong place. This can cause problems, like a short circuit, which can make your project stop working.
Using a solder sucker helps fix this problem. It allows you to remove the excess solder and start fresh. Without a solder sucker, you would have to manually scrape off the solder, which is difficult and can damage the board. The solder sucker makes this process quick and easy, ensuring that your work is neat and precise.
How Does a Solder Sucker Work?
Understanding how a solder sucker works can help you use it more effectively. The basic idea is that the tool uses suction to remove molten solder from a circuit board. Let’s break down the steps of using a solder sucker:
- Heat the Solder: First, you need to heat up the solder you want to remove. This is done using a soldering iron. Once the solder becomes liquid, you are ready to use the solder sucker.
- Activate the Solder Sucker: The solder sucker has a mechanism that allows it to create suction. This is often done by pressing a button or trigger, which releases the vacuum inside.
- Place the Solder Sucker: When the solder is melted, you quickly place the nozzle of the solder sucker over the solder and activate the vacuum. The suction pulls the solder into the tube of the sucker, removing it from the circuit board.
- Clean the Solder Sucker: After you’ve sucked up the solder, it’s important to clean the tool. This prevents leftover solder from blocking the nozzle and ensures that the tool works properly next time.
Different Types of Solder Suckers
There are a few different kinds of solder suckers, each with its own set of features. Here are the main types you might encounter:
Manual Solder Suckers
The most basic type of solder sucker is the manual version. These are small, handheld tools that you need to operate by hand. They consist of a plunger and a tube. You press the plunger to create suction, then release it to suck up the solder.
While manual solder suckers are affordable and easy to use, they can take some practice to master. The suction power may not be as strong as the electric versions, but they can still do a great job for most projects.
Electric Solder Suckers
Electric solder suckers are more advanced than manual ones. These tools use a motor to create suction, so all you have to do is press a button. Electric solder suckers are faster and more powerful, making them a popular choice for people who do a lot of soldering work.
However, they are usually more expensive than manual solder suckers. They also require batteries or an electrical outlet to work, which can limit where you can use them.
Desoldering Pumps
Desoldering pumps are another variation of the solder sucker. These pumps are often used for very specific tasks, like removing solder from through-holes in circuit boards. A desoldering pump works in a similar way to the manual solder sucker but is often more precise.
While the basic function is the same, desoldering pumps tend to have smaller nozzles and can be used for more delicate tasks. They’re also known for being easier to clean than other solder suckers.
Choosing the Best Solder Sucker
Now that you understand how solder suckers work and the different types available, you might be wondering how to choose the best one for your needs. Here are some factors to consider when making your choice:
1. Ease of Use
If you’re just getting started with soldering, you might want to go with a manual solder . These are simple to operate and don’t require any electricity. They’re also inexpensive, which makes them a great option for beginners.
However, if you’re planning to work on bigger projects or do a lot of desoldering, an electric solder might be more practical. It can handle larger amounts of solder and requires less effort on your part.
2. Suction Power
Suction power is one of the most important factors to consider when choosing a solder . If the tool doesn’t have enough suction power, it won’t be able to remove the solder effectively. Some manual solder suckers don’t have very strong suction, which can make them harder to use, especially on larger joints.
Electric solder suckers generally offer more powerful suction, making them a better choice for tougher jobs. Make sure to check the product specifications to see how powerful the suction is.
3. Cleaning and Maintenance
Like any tool, your solder will need regular cleaning and maintenance. Some models are easier to clean than others. Manual solder suckers usually only require you to wipe out the tube after use, while electric solder suckers might require more care.
You should also look for a solder that comes with spare parts, such as replacement tips, to ensure that it lasts a long time. A well-maintained tool will make your projects go smoothly.
4. Price
Solder suckers come in a range of prices. Manual versions are usually cheaper, while electric ones can be more expensive. It’s important to consider your budget and how often you’ll be using the tool.
If you’re just starting out and don’t plan on doing a lot of soldering, a manual solder will be a good choice. However, if you plan to use it often or for large projects, it may be worth investing in a higher-quality electric version.
How to Use a Solder Sucker Effectively
Using a solder sucker might seem tricky at first, but with some practice, you’ll get the hang of it. Here are a few tips to help you use your solder effectively:
1. Heat the Solder Properly
Before you try to remove solder, make sure it is fully melted. If the solder is too cool, the sucker won’t be able to remove it properly. Use your soldering iron to heat the solder until it is liquid.
2. Act Quickly
Once the solder is melted, you need to act fast. The longer you wait, the more time the solder has to cool and harden again. Place the solder nozzle over the solder quickly and activate the suction to remove it.
3. Use the Right Size Nozzle
Make sure the solder has the right size nozzle for the job. If the nozzle is too big, it might not be able to fit in small spaces. On the other hand, a nozzle that’s too small might not have enough suction power.
4. Clean the Solder Sucker After Use
After each use, it’s important to clean your solder to ensure it continues working properly. Wipe out the inside of the tube, and check for any leftover solder that might be blocking the nozzle.
Conclusion
A solder is a simple yet powerful tool that makes your soldering projects easier and more successful. Whether you’re a beginner or an experienced hobbyist, understanding how to use a solder sucker will help you achieve clean, professional-looking results.
By considering the type of solder that suits your needs and learning how to use it properly, you’ll be able to handle any desoldering task with confidence. So, next time you’re working on an electronics project, make sure you have a solder on hand!
Also Read: TALIS


Leave a Reply