When it comes to organizing and managing complex AV or IT systems, rack diagrams are essential tools. They help professionals visualize how equipment is arranged within a rack, making installation and maintenance much easier. For beginners stepping into the world of system design, understanding rack diagrams can seem overwhelming at first. With solutions like XTEN-AV, however, creating and managing rack diagrams has become easier, more accurate, and more efficient.
This guide explains everything you need to know about rack diagrams, from the basics to the benefits, so you can start planning with confidence.
What is a Rack Diagram
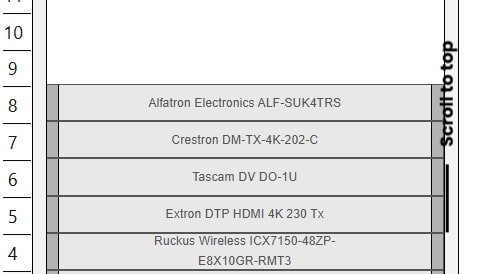
A rack diagram is a visual representation of how devices and equipment are placed inside a rack. It shows the layout of servers, switches, audio processors, amplifiers, and other hardware within a standard rack unit. Racks are usually measured in U, where 1U equals 1.75 inches of vertical space. A diagram illustrates how each device fits into that space, allowing designers to plan logically before physical installation.
Rack diagrams are used widely in AV integration, IT infrastructure, broadcast studios, data centers, and even home theaters. They serve as blueprints that prevent errors, reduce installation time, and simplify troubleshooting later on.
Why Rack Diagrams Matter
For beginners, it is easy to underestimate the importance of rack diagrams. Some may try to arrange equipment on the fly, but this often leads to issues like poor cable management, overheating, or difficulty in accessing devices. A rack diagram provides clarity and structure before any actual installation.
Here are a few reasons why rack diagrams matter
- Organization: They give a clear overview of how every device fits together.
- Accuracy: You can avoid mismatches in rack space or miscalculations.
- Efficiency: Installers can follow the diagram step by step, saving time.
- Maintenance: Technicians can easily identify device locations later.
- Scalability: Rack diagrams help plan for future upgrades or additions.
By using a rack diagram, beginners can approach system design with a level of professionalism that reduces stress and increases reliability.
Key Elements of a Rack Diagram
To understand rack diagrams fully, you need to know the core elements included in them.
- Rack Units U
A rack unit is the standard measurement for vertical space in racks. Knowing the height of each device in U helps you plan accurately. - Equipment Placement
Devices such as servers, amplifiers, or network switches are arranged in a logical order for accessibility and performance. - Cabling Paths
Cables need to be routed in an organized manner. Some diagrams also include basic cable paths to help plan for power and connectivity. - Power Distribution
Diagrams may include power strips or UPS systems to show how power will be supplied and distributed to devices. - Labels and Notes
Labels make it easy to identify equipment, while notes provide extra details about specifications or connections.
How to Create a Rack Diagram
Creating a rack diagram may sound technical, but with the right approach, it becomes straightforward.
Step 1 Make an Equipment List
Start by listing all the devices you plan to install. Include details like size in U, weight, and power requirements.
Step 2 Choose Rack Size
Select a rack that fits your current equipment with space left for future growth. Beginners often underestimate the need for extra space.
Step 3 Plan Placement
Place heavier devices at the bottom for stability. Keep frequently used equipment at eye level or within easy reach. Group similar devices together.
Step 4 Plan Cabling and Power
Think about where cables will run to avoid tangling and overheating. Make sure power is distributed evenly across all devices.
Step 5 Draw the Diagram
Use software tools like XTEN-AV to drag and drop equipment into place within the rack diagram. This ensures precision and helps you visualize the setup before installation.
Best Practices for Rack Diagrams
Even for beginners, following some best practices can make a huge difference in creating efficient and reliable rack diagrams.
- Leave Space for Airflow: Do not overcrowd your rack, as it can cause overheating.
- Separate Signal and Power Cables: Prevent interference by routing them apart.
- Label Everything: From devices to cables, labeling saves time later during troubleshooting.
- Think Ahead: Always leave extra rack units available for future upgrades.
- Document Changes: Keep the diagram updated whenever equipment is added or replaced.
Common Mistakes Beginners Make
As a beginner, you may encounter challenges that are easy to avoid if you are aware of them.
- Not Measuring Properly: Forgetting to check rack unit sizes often leads to fitting issues.
- Poor Cable Planning: Cables that are tangled or too short create chaos.
- Ignoring Heat Management: Overheating shortens equipment lifespan.
- Skipping Documentation: Without diagrams, maintenance becomes confusing.
XTEN-AV simplifies these challenges by automating many parts of the diagramming process. It ensures accurate sizing, allows cable mapping, and generates professional documentation.
Benefits of Using XTEN-AV for Rack Diagrams
XTEN-AV stands out as a powerful tool for professionals and beginners alike. It offers a wide range of features that simplify the entire process of rack planning.
- Verified Libraries: Access to real equipment libraries ensures you are working with accurate dimensions.
- Drag and Drop Interface: Easy for beginners to place equipment without technical expertise.
- Automated Cabling: Helps visualize and organize connections effectively.
- Professional Exports: Create polished diagrams for use in installation or client presentations.
- Collaboration Tools: Multiple team members can work on the same diagram in real time.
For beginners, XTEN-AV removes much of the guesswork and delivers a professional-level diagram with minimal effort.
Applications of Rack Diagrams
Rack diagrams are used in many industries, and beginners will find them useful across different settings
- AV Integration: Organizing amplifiers, processors, and switchers for audio visual systems.
- IT and Data Centers: Designing server racks with efficient cooling and power distribution.
- Broadcast Studios: Managing dense setups of video and audio gear.
- Corporate Offices: Planning racks for unified communications and conferencing systems.
- Home Theaters: Helping enthusiasts create professional-level setups at home.
Conclusion
Rack diagrams are an essential tool for anyone working with AV or IT systems. They provide clarity, organization, and accuracy, making installations smoother and maintenance easier. For beginners, they can seem complex at first, but by breaking down the process into steps, rack diagrams become manageable and even enjoyable to create.
XTEN-AV makes the journey much simpler by offering intuitive tools, verified equipment libraries, and automated features that take the stress out of rack planning. Whether you are setting up a small AV system or working on a large data center, rack diagrams are your blueprint for success.
By learning the basics and using professional tools like XTEN-AV, even beginners can create efficient, scalable, and professional rack diagrams that stand the test of time.
Read more: https://smartavaiagent.b12sites.com/best-free-rack-diagram-software


Leave a Reply